I’ve tried running my mask twice now, in foam and gelatine. The mould didn’t fill properly either time, which suggests I need to move the injection hole. I’m going to drill another one at the tip of the nose, moving it down from between the eyebrows. This should help the product get around whatever is causing the problem.
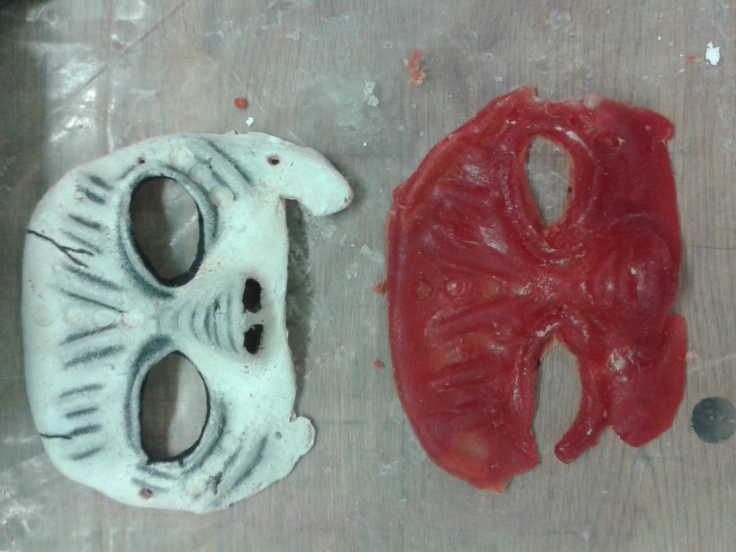
However, I will not be running the mask in gelatine again. Although the translucent red looked really good the weight, even as a half mask, was too much. If my client wore the gelatine mask for a performance it might break or tear.
I tried painting the mask white, like the face paint my client wears. However I don’t think it looks as stong as the red, but I do like the silver highlighting. I’ll try and bring that in to the full face piece when I have one.
I wanted to be able to practice painting my mask, before I ran my foam piece. To do this I ran slip latex pieces – which is where liquid latex is brushed in to the mould. This gives a rough version of how the piece will look, but it doesn’t fill all the space in the mould the way foam, silicone or gelatine would.
I tried both clear latex that I painted red and red latex. I definitely prefer the results I got with red latex. I had a harder time contouring the painted red piece, the paint got quite muddy.
When I had the red latex piece I also tried adding in the spikes my client asked for, to see how well they stood out. Attaching things to prosthetics or masks can pull at or distort the piece, but because I’m using plastic spikes they’re very light. That minimises the risk of damaging the piece.
I saw some jeans on Pinterest that were white at the top and blck on the legs. I liked the idea, but I thought it would look better the other way up.
I started by soaking some black jeans in bleach mixed with water. I did this twice, leaving the jeans for about an hour each time. I used about ¾ of a bottle of bleach in each bowl of water. I then rinsed out the jeans. I thought they would need bleaching again. After I washed the jeans they were much lighter, mostly almost white, Unfortunately the jeans were a bit patcy at the top of the legs.
I decided to combat this by dyeing the jeans. I chose pink (one of my favourite colours) but it was such a large area that I decided to go with powder pink instead of bright pink. I used the new Dylon dye, with the salt added. It was so easy – just throw the jeans and they dye powder in the washing machine and run twice. Once to colour and once to rinse.
They still look a bit patchy. Next time I dye clothes I will try to make sure the base is even.
I’ve seen a lot of galaxy themed things on pinterest recently. Galaxy hair, galaxy nails and galaxy shorts just to start. Since getting a nice manicure would be a waste right now and I can’t afford galaxy hair, I decided to make myself some galaxy shorts.
Step 1:
Take a pair of black shorts and your paint (I used pearlescent red, blue and purple fabric paints) and roughly sponge the first colour across the shorts.
Add the other two colours, overlapping the paint in some places.
Once I finished layering my paints I wasn’t happy with my colours. The pearl in the paint made everything look too silver and the colours were really hard to tell apart.
Step 2:
I took acrylic paints in different shades of purple and blue, and sponged them across on top of the pearlecent paint to reduce the shine. I then left the shorts to dry.
This looked more like I wanted it to. If you use paints you like at first this is all only 1 step haha!
Step 3:
Once the paint was dry (to stop the white mixing in) I used the end of a paintbrush and white acrylic paint to create the stars. I dabbed them on in rough groups so they looked like constellations.
This shoot with Dalli Sixx not only gave me the chance to try war paint for the first time (in aqua colour because it didn’t have to stand up to a stage show), it gave me the chance to brush off my photography skills for the first time in a while.
The purple doesn’t show up in the photos as clearly as it did in person, next time I do Dalli’s make up I’ll use brighter purples. Other than that I’m really happy with how the pictures turned out.
These are a few behind the scenes shots from today’s shoot with Michelle and Bashir.
We shot 2 looks, the boudoir look and the creative paint splatter look. I spent a lot of the day on lighting duty, because we were experimenting with coloured gels and movement. To get the colours to look right they had to be angled in the right way.
This was a really fun experimental shoot, and I can’t wait to see the results!
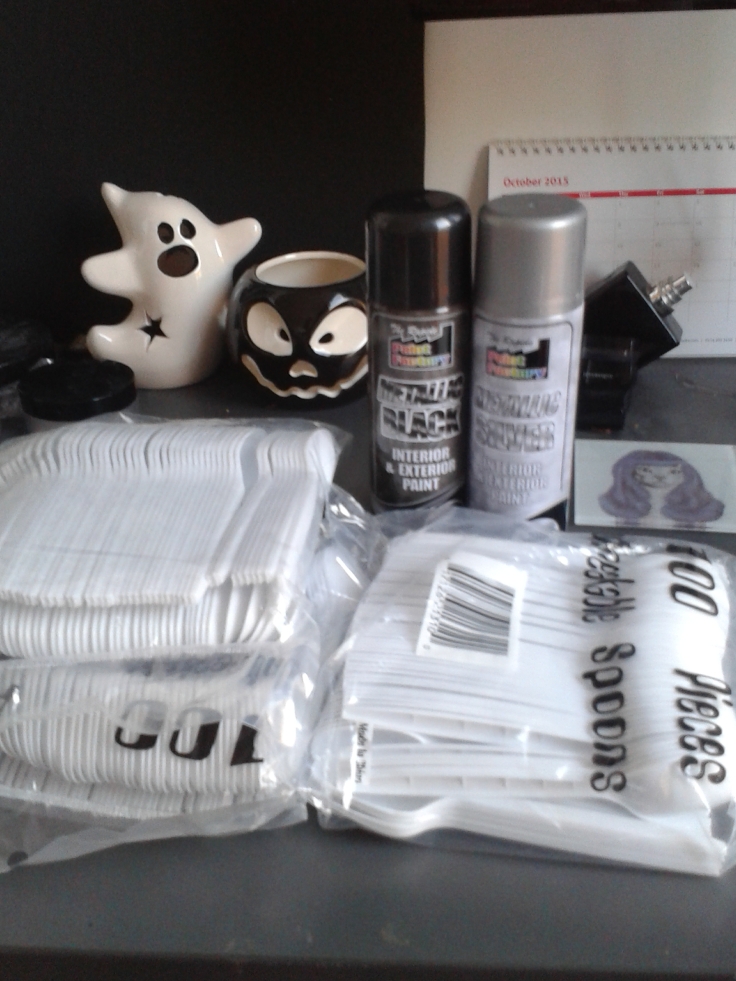
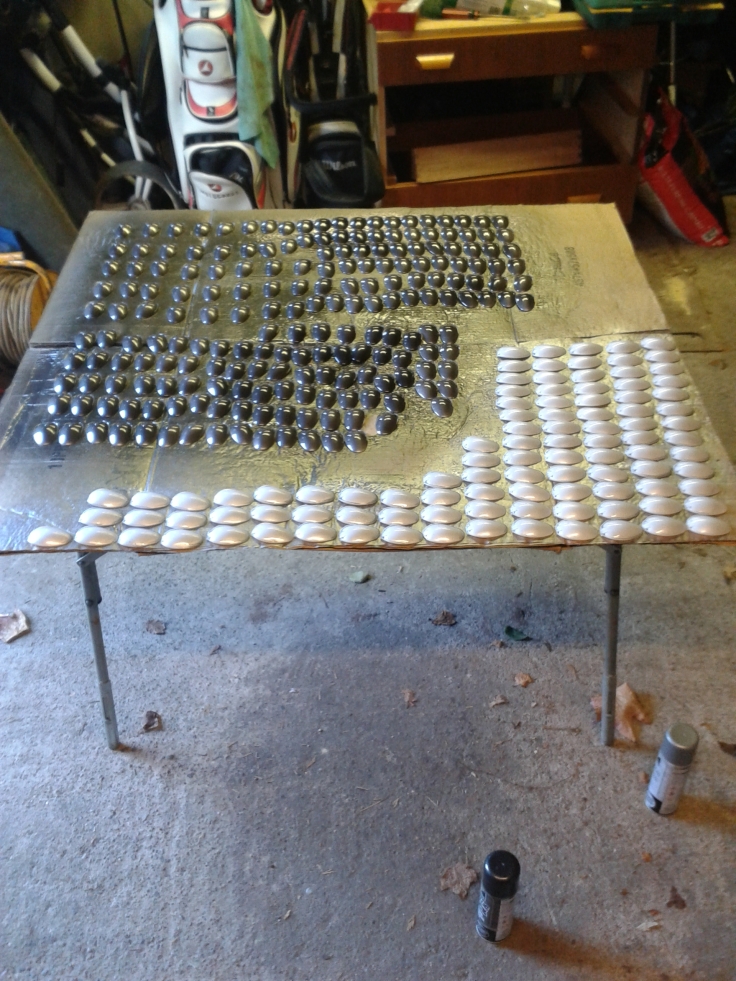
300 plastic spoons
1 can metallic black spray paint
1 can metallic silver spray paint
Twine or cord (strong but not too thick)
Thread
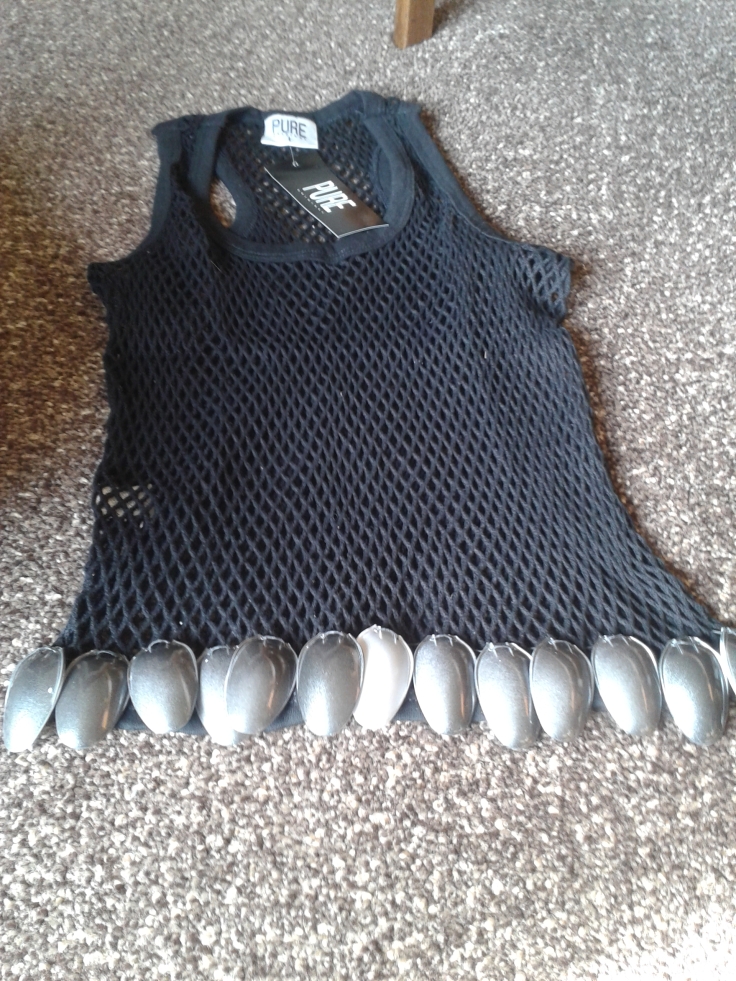
Fishnet vest
Equipment:
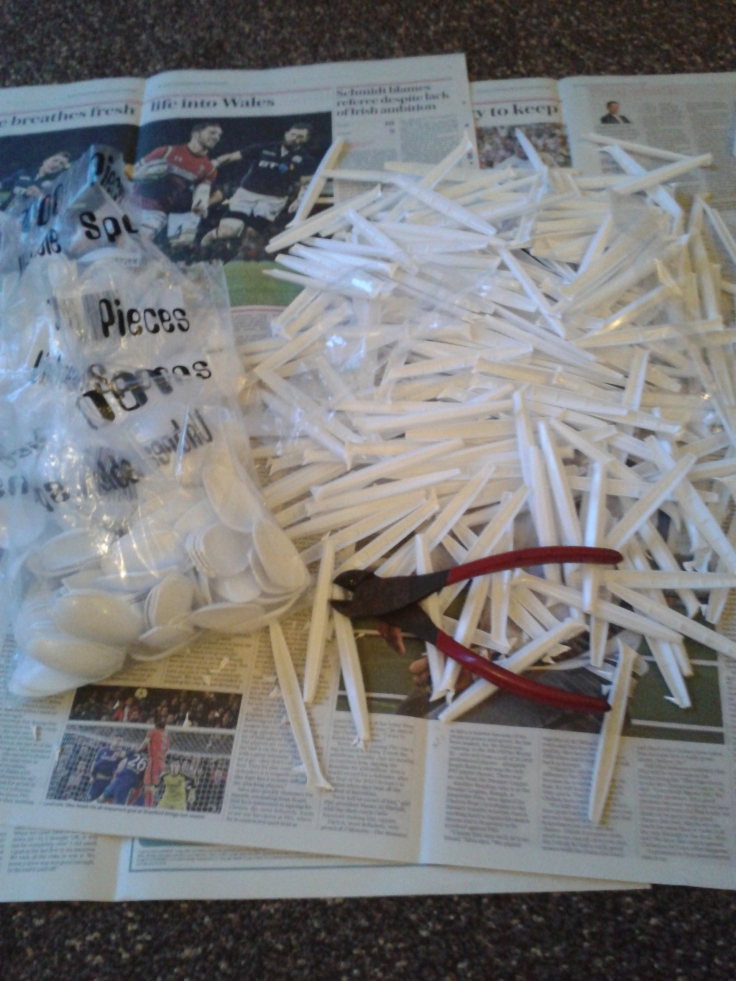
Pliers
Drill and 2 mm drill bit
Needle
Step 1:
Cheap plastic spoons are soft, so it’s easy to remove the handles with pliars.
Step 2:
Drill 2 small holes in the top of each spoon.
Step 3:
Spray paint the spoons somewhere well ventialted.
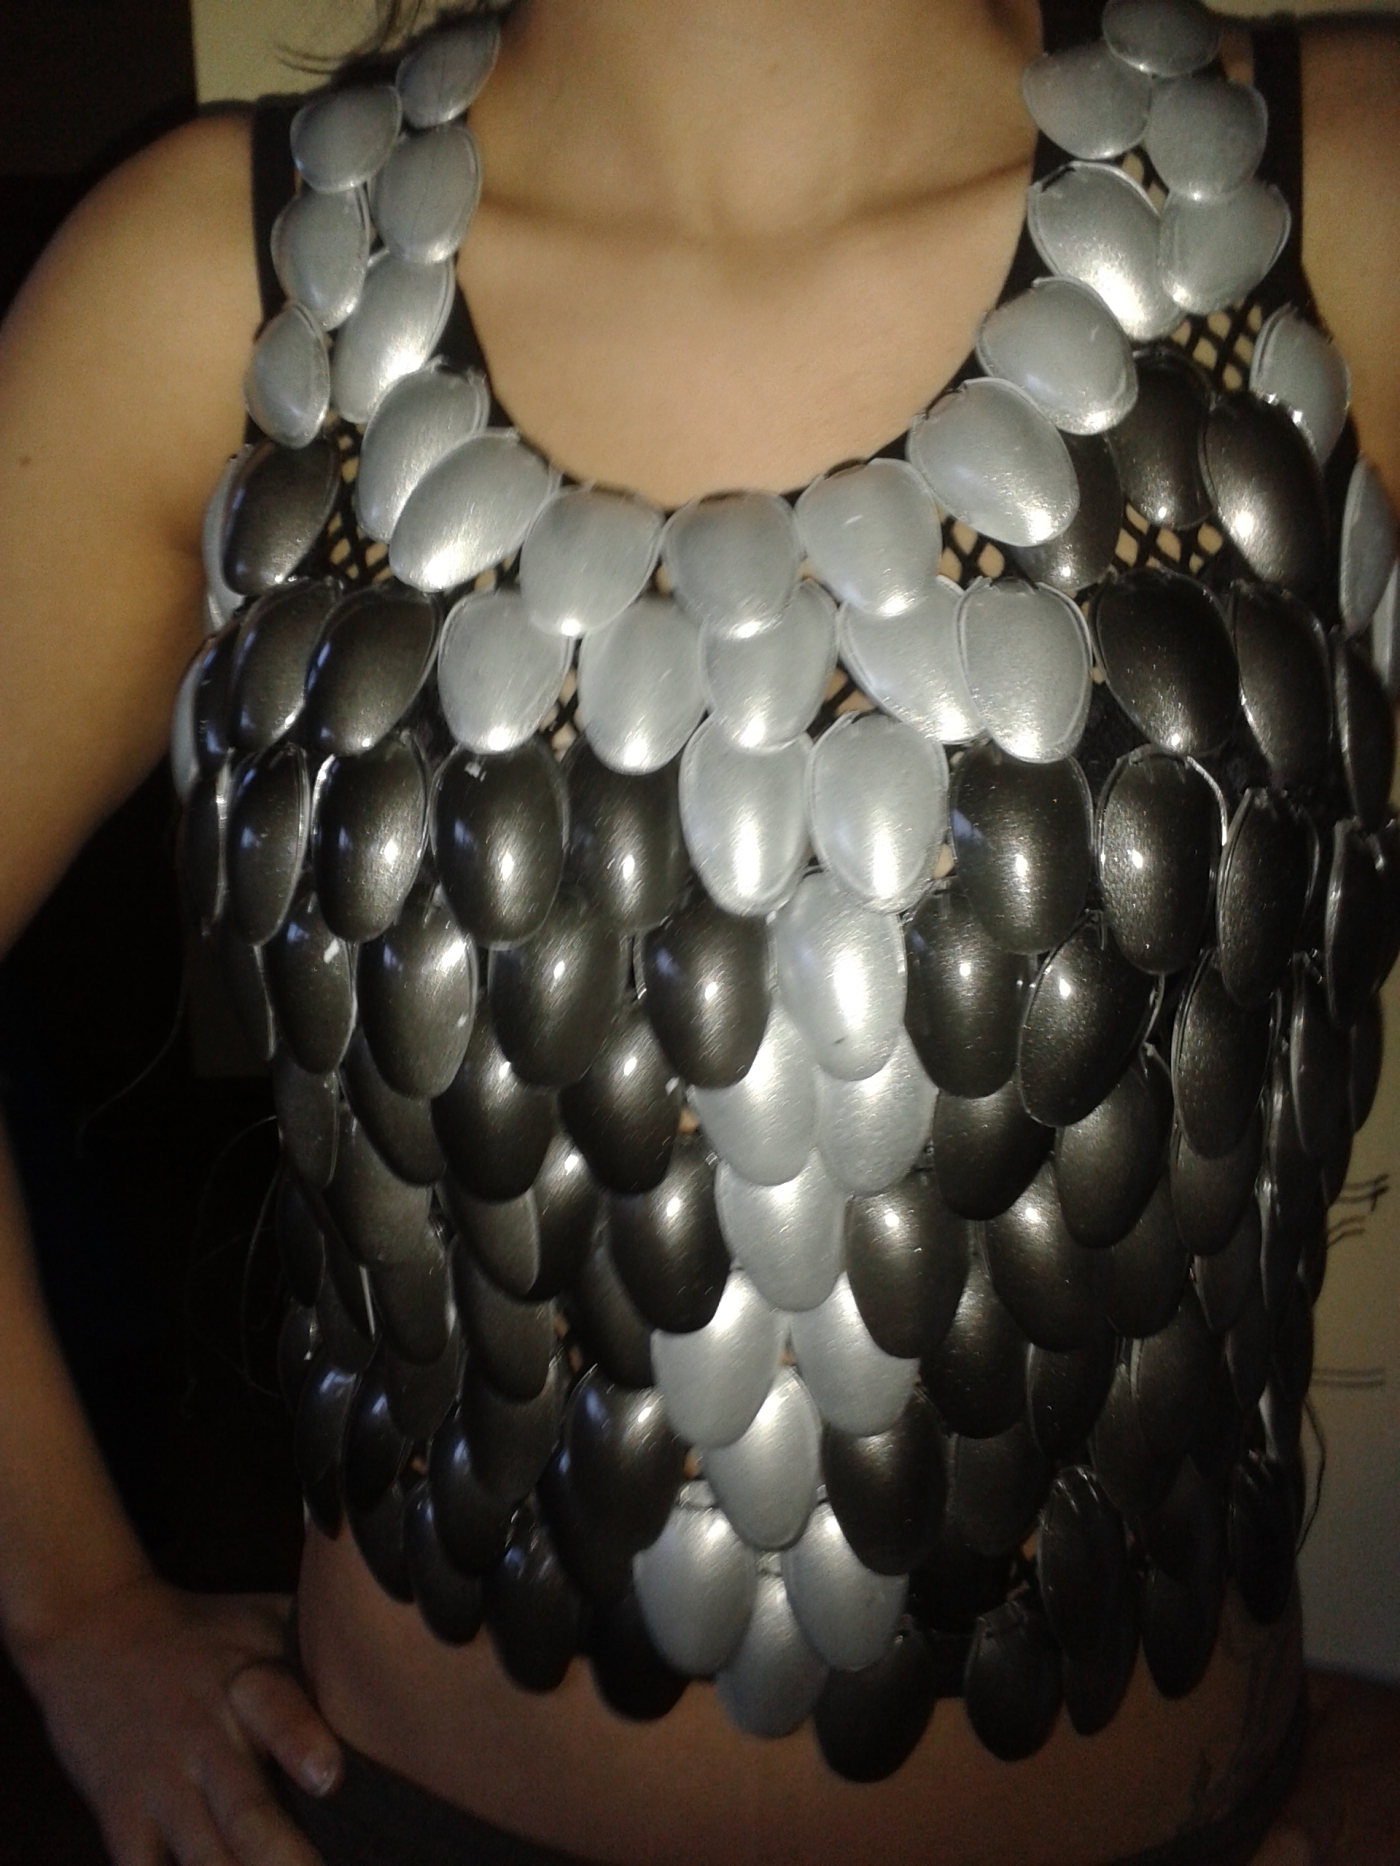
I did 200 black and 100 silver. I laid the first lot (close together to save paint) and sprayed them black. I ended up using the whole can making sure everything was covered. I then set out the second lot and sprayed them silver. Spray paint takes a while to set so choose somewhere you can leave the spoons for however long it says on the can.
Step 4:
Begin assembling the armour.
I used a fishnet top for the base so I could weave the cord through it once the spoons were threaded on.
I measured a length of cord twice as long as the width of the top to make sure I had enough. I started from the middle, so I could get the silver scales in the right place and then worked out from there. I threaded the cord through the holes in the spoon, and then through the net.
I staggered the silver spoons up the middle in a 1-2-1-2 pattern, because if I tried to do a single line it wouldn’t have lined up right.
Step 6:
I planned out the silver scales around the neck line. I then used a needle and thread to stitch the scales to the solid fabric around the neckline.
When I tried the armour on I found holes in the top section, so I went back in and sewed more scales in the gaps.
The finished armour will be revealed in my shoot with Aggy G!


Recent Comments